Landscape Articles
Six Possible Reasons For Landscaping:
1. You need to landscape around your new house.
2. You want to re-landscape your pre-owned house.
3. You want to create an outdoor environment that you can enjoy, including a water interest and an attached covered wooden deck with an outdoor kitchen, dining, and lounging area with an outdoor fireplace.
4. Most of the houses in your neighborhood have remarkable landscapes and you want to fit in.
5. You are passionate about plants, trees, and gardening.
6. You want to go green and create a sustainable environment.
If you plan to prepare for, at least, the first six reasons above, it is important to be aware of some of the costs that you might incur before you begin a project of this extent. Then, you may find that the true cost of the project is much more than you anticipated, and you may wish to alter your original plans to fit your financial requirements.

Drainage Problems And Solutions
It is a must to solve all drainage issues
around your property, especially near the
house. The downspouts need to be piped away
from all structures to prevent damage to the
foundation and to keep water from entering
the basement.
Most people and contractors attach the drain
pipe directly on to the down pipe from the
gutter. To prevent the drain pipe from
becoming clogged up with leaves and debris,
it is better to install a 12" x 12" drain box
below the downspout pipe, so that the drain
box can be cleaned out from time to time.
Low areas in the yard can be drained by
installing a drain box in the center of the
problem area. Make sure you install the box
at least 2 " to 3 " below the lawn surface
and slope the ground down into the box. You
need to determine where you can drain the
water, either to the street or a back corner
of your lot. Remember, the pipe has to
have fall for it to drain.
French drains can also be use to drain wet
areas. A french drain is a 4" drain
pipe/with a sock to prevent dirt from
entering. The 4" drain pipe must have gravel
around it and must slope down hill for it drain.
In conclusion, you must decide where you can
drain the water before starting. In many
areas, it is against the law to drain your
water on to your neighbor's property. The
water pipe
may dump on to your property before it
gets to the neighbor's. Make sure that you are
not draining toward the neighbor's house.
Growing Lilies
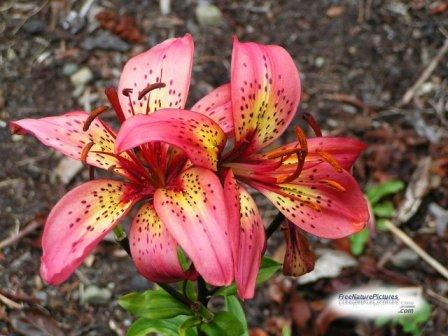
Lilies are one of the world's most favorite flowers admired in all places - the flower shops, hotel rooms, in the gardens, and in the wilds. Its popularity stems from its various sweet scents and its colorful, showy flowers. In Chinese, the word "lily" means "forever in love".
There are over 100 different known species (and still growing) of the lily plant. These are found mostly in Europe, India, southern Canada, the United States, the Philippines, and in northern parts of the Mediterranean.
Variety The major two types of lilies are the Oriental and the Asiatic varieties. Orientals bloom during late summer and they give off strong, sweet scents. They usually have large fragrant blossoms. (Lilium Stargazer is one of the most common types of Oriental lilies.) Asiatic lilies are hybrids, originated from Asiatic species. They are easy to grow and they generally bloom during early summer. They are hardy as well and thrive in soil that drains well. These types of lilies also come in a wide variety of vibrant colors.
Growing Lilies are versatile in that they can grow in the woods, in the open with full sunlight and in the grasslands with all the other plants. Some varieties can even grow in marshes. Lilies love to grow in soil that is acidic and free of lime. The soil must drain well for lilies to survive. A good mix of sand, peat, and compost is ideal.
Shapes and forms Lilies are grown mostly from bulbs made of scales that overlap. (In China, some species use the bulbs for food.) Some grow from underground stems called rhizomes. Lilies that grow under the sun sport leaves that are narrow and have parallel veins. Those grown under shades have wider leaves with net veins. All the plants have stiff stems.
Flowers The major charm of lilies is their fabulous flowers. They boast of a number of bright exuberant colors and varieties. They come in bright shades of yellow and pink, white, orange, purple, cream and lilac and many more in-between. They have the same basic form of three outer petals (called sepals) and three inner petals. The exterior color of the sepals is sometimes different than the interior petals. Interior colors may be plain, spotted, splashed or linear. They can also be ridged or smooth. These differences make up for the overall allure of the flowers themselves.
False lilies Many flowers that have the name lily attached to them aren't in the lily family (Liliaceae). Calla lilies and peace lilies are from a different family (Araceae). Others belong to the daffodil family (Amaryllidaceae). Lilies are different from daffodils because they don't have petals that are attached to the seed receptacles, like the daffodils. The same is true for the many species of water lilies. They are from a completely different family of flowers.
(On the other hand, wild onions, leeks and wild garlic are in the lily family, as well as trilliums, tulips and hyacinths.) In some countries, there are traditions that put symbolism to lilies, giving the flower some philosophical and spiritual meanings that have withstood time. Usually, lilies are thought to symbolize purity, innocence, and new life.
Have A Great Story About This Topic?
Do you have a great story about this? Share it!
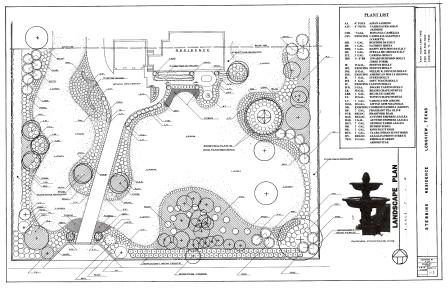
Order Your New Landscape Design Today!
Always Design Before You Plant!
Click The Above Link To Get Your Dream Design Started Now!


Privacy Disclaimer About Contact This Site Built: Solo Build It
Copyright © 2003 - 2023 by Web-Landscape-Design-Ideas.com.
All rights reserved.
Note: Lily Picture Credit
http://www.freenaturepictures.com/lily-pictures.php