Drainage Problems
When exterior nightmares are discussed, drainage has to be the number one issue. Drainage problems in your landscape must be solved before damage to the house foundation occurs and or water enters the house during heavy rains.
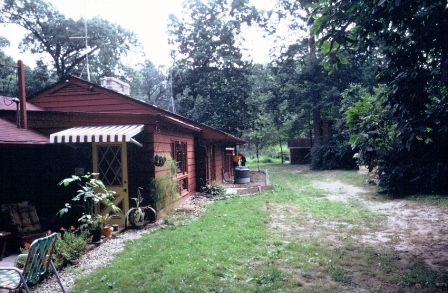
When this homeowner call me for an appointment, I could not believe how they continued to live in this house. Oh, the house interior was fine that was not the problem.
They had owned this property for 8 years and had water inside the house 4 times. They had 3 other contractors during that time trying to solve the drainage problems. They spent $4,000 with the last contractor on top of $10,000 with the other two firms. $ 14,000 later, the same problems remained.
A shallow pond down the street would flood each time it rained. After the water flooded the neighbors yard the water would go down through this backyard like a river. This house was built on a concrete slab. Looking at this picture, the floor level inside the home is the same as bottom of the yellow door.
The last contractor had installed a drain pipe along the back side of the house which was installed 12" above the inside floor level. Sorry, it didn't work.
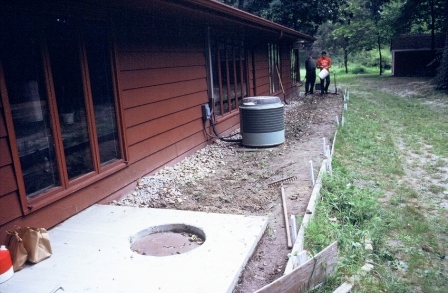
The siding from the ground level to the bottom of the windows along the back side of the house was removed. Pressured treated 3/4" plywood was installed to replace the siding. The plywood was coated with tar roofing coating and 6ml. plastic film was placed over the tar. The plastic was tucked up under the siding and ran down about a foot below the inside floor level and another coat of tar was applied to the plastic.
The above picture shows the 6 x6" pressured timbers retaining wall installed to prevent the water from entering the home. Landscape soil mix was installed inside the retaining wall and landscape plantings to beautify the area.
The backyard swale was widen to allow the water movement through the yard. The water from the shallow lake was still going to overflow into this yard that we could not prevent.
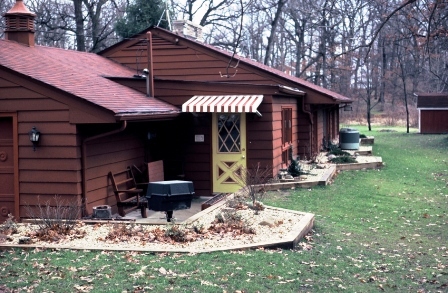
Thirty - two years later, still no more problems inside this home.
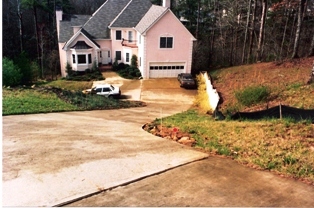
This large driveway and the entire front yard of this property drained down to the front of the house. A 6 ft. by 3 ft. drain box was constructed of concrete at the end of the parking area which is where you can see the small white car parked.
A 8 inch diameter drain pipe was install from the drain box down the hill along the side of the house to a creek in the back of the property.
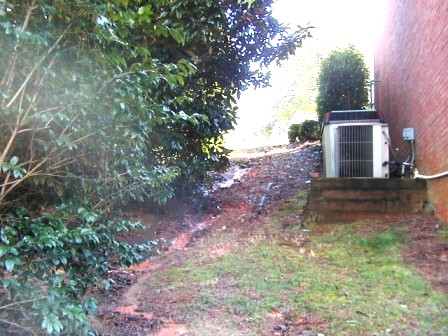
The erosion that you can see in this picture is caused the by the water flow from the entire front yard of this property and the neighbors front yard.
 |
 |
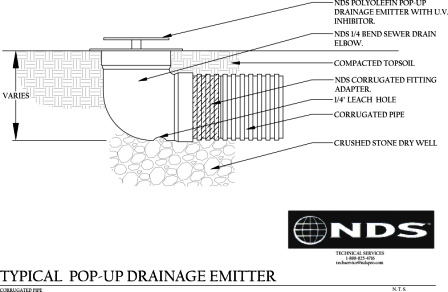
The old drain pipe that you can see on the left side of this picture is full of roof debris and no longer works. Each roof downspout should drop into a catch basin like the picture on the upper right. Leaves and other debris from the roof can easily be cleaned out of the catch basin instead of clogging the drain pipe.
Picture from http://www.NDSPRO.COM
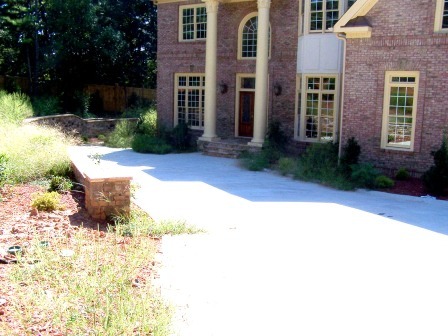 |
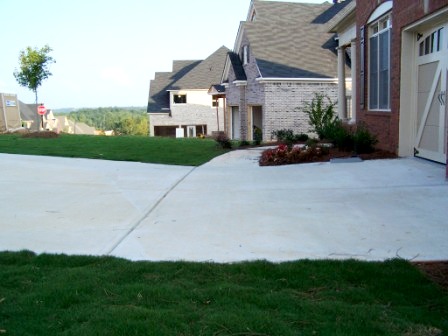
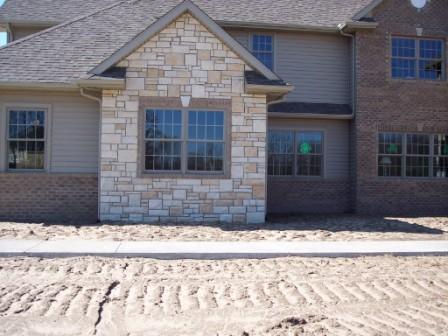
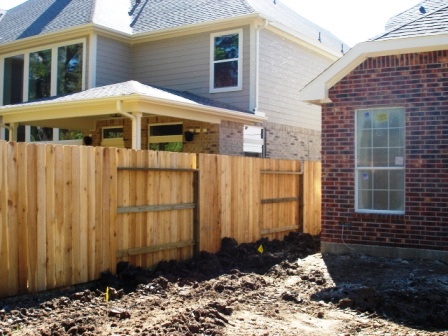
This new house was built too low so the driveway slopes toward the house front wall. Many home builders are good builders but they don't have a clue on how to site the home on the property. A lot of homeowner drainage issues are the direct result of the house being built at the wrong elevation. If the house elevation was only 1ft. higher all of the drainage issues would have been solved during construction.
 You can see the swale along the outside of this patio that swale carries the drainage from the shaded side of the house across the backyard and around the other side of the house toward the street. Why! The house was built at too low of elevation. If the house floor level was at a higher elevation , the shaded area could have drained toward the street. |
 The water drainage from the driveway comes off of the drive near this walk and runs across the front yard. A catch basin needed to be installed next to the drive to catch the water and prevent it possibly entering the basement of this home. |
 |
When a driveway slopes toward the garage door, the water could flow into the garage during heavy rains.
It is always better to have the driveway slope toward the street, but in this case the house is lower than the street.
The picture below shows a driveway trench drainage trough that should have been place where you can see the grove in this concrete drive.
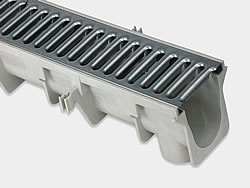 |
http://www.NDSPRO.COM dura-slope-trench-drain-250x188 |
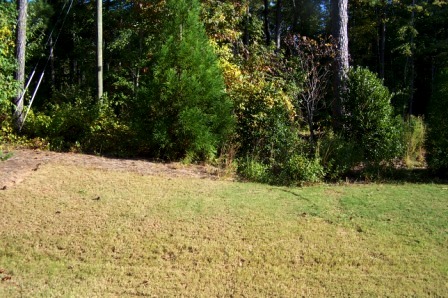
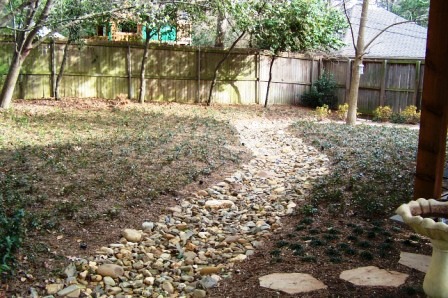 The drainage from the back neighbor's property runs under the fence that you can see in this picture. This Dry Creek was designed and installed to allow the drainage to pass through the landscape. |
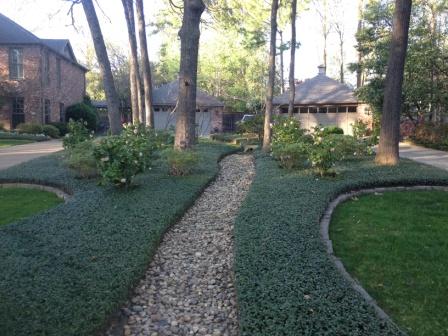 This Dry Creek is a continuation of the Dry Creek in the above picture toward the front street. A large volume of water flows though creek during heavy rains. The ground cover is Asian Jasmine. |
 A large volume of water flows off of the large roof area when it rains . In fact, this picture shows a large roof draining from the upper roof to a small gutter on the lower small roof which can't handle the high volume so it probably over flows like a water fall during heavy rains. The downspout from the upper roof should have been extended to the ground as a separate pipe. The downspouts need to be piped out belong the sidewalk so the planting will grow properly. |
 |
 |
 |
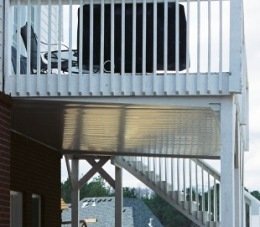 |
Many companies make a under deck drainage system as shown in this picture. This system keeps the lower patio dry and usable. |
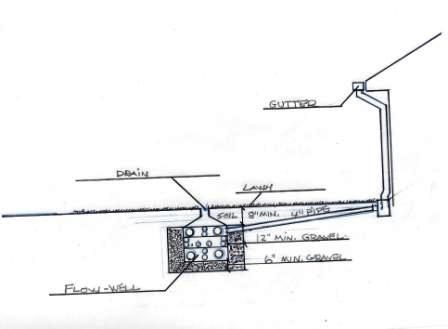
 The narrow space between this house and the property fence is a drainage problem in the making. this area is usually flat and no where for the rain water to flow. A french drain which is a drain pipe with slites to allow the water to enter surrounded by 57 stone. The drain could be run into a Flow-Well which is installed in the ground surrounded by gravel also. |
 This backyard had drainage water from the street ditch entering the property. The homeowner could not get the county to solve the problem so I designed and installed a Catch Basin where the water was entering property. A drain pipe was extended to the front street to solve the counties problem. |
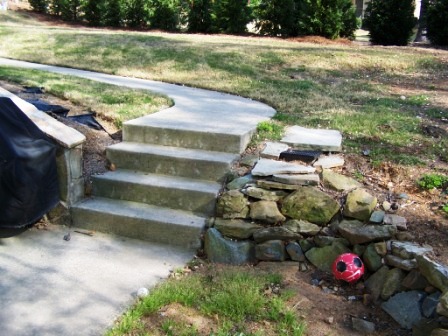 These steps are part of the backyard drainage pattern. A small retaining wall the height of the steps were installed where the rocks are in the picture. 2Catch Basins surrounded by concrete were placed behind the wall to catch the run off. |
 |
Have A Great Story About This Topic?
Do you have a great story about this? Share it!
Order Your New Landscape Design Today!
Always Design Before You Plant!
Click The Above Link To Get Your Dream Design Started Now!

Privacy Disclaimer About Contact This Site Built: Solo Build It
Copyright © 2003 - 2026 by Web-Landscape-Design-Ideas.com.
All rights reserved.